In the U.S., 2025 has redefined the standard for tactical readiness training. It’s now more than just owning a bug-out bag and requires you to develop active skills in case the systems fail. Across the country, disaster relief faces consistent delays, leaving the first 72 hours of any emergency to the individual. Added to this are frequent cyberattacks on critical infrastructure and the ongoing instability of global supply chains. What can the average American actually do to stay self-sustaining and protected?
In this Tactical Survival playbook, we break down essential readiness into three comprehensive pillars designed to empower you with competence, rather than fear. You’ll learn the fundamentals of tactical gear and how to balance mobility, access, and loadout for up to 72 hours of self-sustainment. You’ll also know how to apply operational security (OPSEC) in an increasingly digital environment. Finally, you’ll build competence in basic trauma medicine and close-quarters defense for high-pressure moments.
Table of Contents
1. Tactical Gear: Choosing Reliable Equipment
1.1. Tactical Backpack
1.2. Tactical Flashlight
1.3. Tactical Knife
1.4. Night Vision Goggles
2. Combat Medic Training
2.1. Core Lifesaving Skills Priority
2.2. Beginner Individual First Aid Kit (IFAK) Essentials
3. Combat Survival: Defense Against Threats
3.1. Close Quarters Combat
3.2. Battlefield Medicine
3.3. Tactical Shooting
4. Reconnaissance Training: Gathering Information Before You Act
4.1. Surveillance Equipment
4.2. Home Camera and Sensor Basics
4.3. Radio Communication
4.4. Intelligence Gathering
5. FAQs
Tactical Gear: Choosing Reliable Equipment for Real Conditions
Your survival plan is only as effective as the tactical gear you carry and how efficiently you can access it under pressure. Tactical gear differs from recreational equipment because it is designed for durability and functionality. At the foundation of every loadout are three key tools: the tactical backpack, which maintains balance and capacity for 24- to 72-hour operations; the tactical flashlight, which provides reliable illumination for navigation and threat identification in any light condition; and the tactical knife, which functions as both a utility instrument and a last-resort defensive tool.
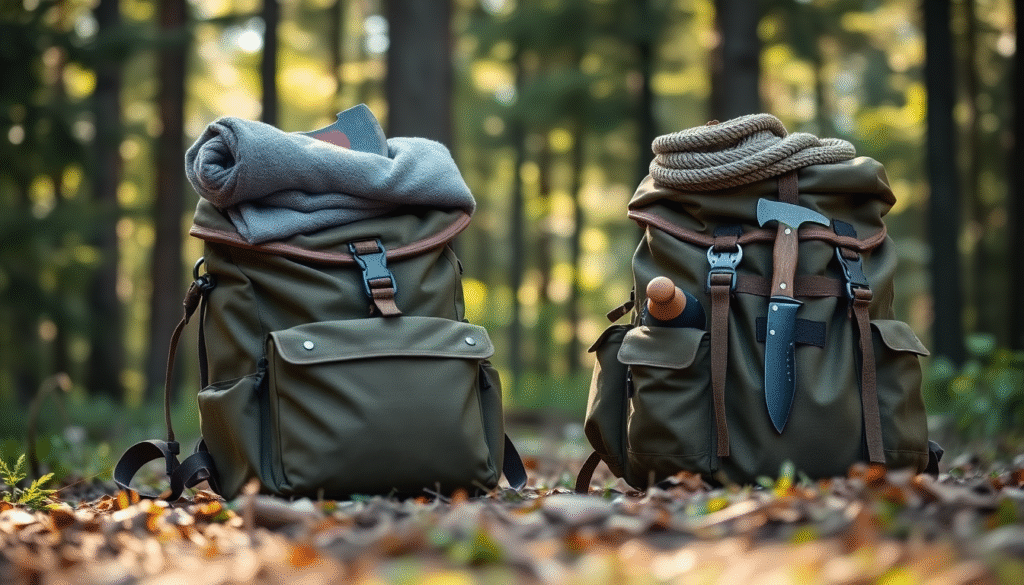
Tactical Backpack

A tactical backpack is a purpose-built loadout pack designed for quick access and durability. Unlike standard hiking or school packs, it uses high-strength nylon and MOLLE webbing to handle heavy loads and allow modular attachments. The design keeps weight close to the spine for balance and includes wide shoulder straps and a padded waist belt to reduce fatigue. For new users, the most important factor is not brand but fit and mission type. A pack that matches your body size and activity will feel lighter and last longer. Look for simple access points, sturdy zippers, and compartments that open fully so gear can be reached quickly in low light or stress.
Capacity by Use Case (EDC to 72-Hour Pack)
- Everyday Carry (15–25L): A small, lightweight pack suited for daily routines that require fast access to a few essential tools.
- 24-Hour Pack (25–35L): A mid-size option that supports short missions or outdoor days where extra layers or food are needed.
- 24-Hour Pack Design Tip: Look for balanced internal compartments that prevent shifting weight during movement.
- 72-Hour Pack (35–55L): A large pack that carries enough gear for multi-day fieldwork or short-term evacuation.
- 72-Hour Pack Fit Tip: Use a framed suspension and padded waist belt to distribute weight and prevent back strain.
Essential Load Organization and Access
- Top Pocket: Keep life-saving tools in the top pocket so you can reach them without removing the pack.
- Main Compartment: Reserve the main compartment for critical supplies that sustain energy and hydration through the day.
- Bottom Section: Place shelter components and extra clothing at the bottom to stabilize the pack and protect soft gear.
- External Webbing: Attach only mission-specific pouches to MOLLE webbing to avoid unnecessary bulk.
- Access Design: Choose a pack with a clamshell or side-zip opening to reach contents quickly when time matters.
- Field Readiness: Practice unpacking and reloading the same layout until it becomes automatic under stress.
Tactical Flashlight

A tactical flashlight is designed to provide dependable illumination in situations where visibility can affect safety. It is engineered to survive physical impact and weather exposure that would damage a standard household flashlight. Most tactical models are made from aircraft-grade aluminum and are sealed against moisture to ensure consistent function in outdoor conditions. Their light output is also usually higher, which allows the user to identify threats or obstacles beyond the normal indoor range.
Indoor/Outdoor Output Requirements
- Indoor Use: A flashlight used indoors should produce between 150 and 300 lumens to avoid blinding glare or light bounce.
- Close-Range Clarity: Choose a warm or neutral white beam for better visibility on reflective surfaces such as walls or metal.
- Outdoor Use: Outdoor environments require a minimum of 800 lumens for open terrain and situational awareness at a distance.
- Beam Shape: Use a focused hotspot for identifying threats or signaling and a wide spill beam for navigation or camp tasks.
- Durability Factor: Select models rated IPX7 or higher to ensure resistance to rain and brief submersion during field use.
Tactical Knife

A tactical knife is a practical cutting and defense tool designed for controlled handling and dependable performance under stress. It is not a decorative item but a functional instrument for cutting cordage, preparing materials, or responding to emergencies. The most useful knives have textured grips to help prevent slips and a balanced weight that helps with accuracy. When picking a tactical knife, beginners should focus on legal compliance and maintenance rather than collecting multiple designs.
Fixed Blade vs. Folder for Daily Carry
Before selecting a knife, consider how often you’ll carry it and what tasks you’ll use it for. A fixed blade is usually stronger and quicker to deploy but requires a sheath for safe carry. In contrast, a folding knife is easier to conceal and safer in a pocket, but it needs more moving parts and upkeep. The table below summarizes key differences for new users:
| Feature | Fixed Blade | Folding Knife |
| Strength | Solid tang provides higher structural integrity. | The pivot mechanism limits leverage strength. |
| Deployment | Ready instantly once drawn from the sheath. | Requires manual or assisted opening. |
| Maintenance | Easier to clean after outdoor or field use. | Hinges need regular cleaning and lubrication. |
| Carry Method | Best suited for belt or chest-mounted sheaths. | Fits discreetly in pocket clips or packs. |
| Legal Limits | Restricted in some urban areas. | More widely legal for public carry. |
Night Vision Goggles

Night vision goggles allow the user to see in low-light conditions by amplifying available light through a specialized sensor. They are most effective in rural or unlit environments where natural starlight or moonlight is present. When choosing NV goggles, consider their wearability and power management before investing in advanced models. A stable head mount is essential to prevent fatigue, and a simple control layout helps avoid confusion in the dark.
Monocular vs. Binocular Selection
Before purchasing goggles, learn how the viewing format affects performance and mobility. Monoculars provide one active viewing tube, while binoculars use two. The table below outlines the primary considerations for each configuration:
| Feature | Monocular | Binocular |
| Weight | Lighter and easier to carry for extended use. | Heavier but offers a more natural viewing experience. |
| Depth Perception | Limited due to single lens design. | Improved depth awareness in low-light movement. |
| Cost | Usually less expensive and simpler to maintain. | Higher cost due to dual tube construction. |
| Power Use | Consumes less battery power per hour. | Requires more power to operate both sensors. |
| Adaptability | Works well as a handheld or helmet-mounted option. | Best for stationary or vehicle-mounted observation. |
IR Use and Device Protection
Infrared (IR) mode emits invisible light that allows a night vision device to function in total darkness. Avoid directing the IR beam toward reflective surfaces, as the returning glare can harm the image tubes inside the device. Additionally, the tool’s optical components are sensitive, and direct sunlight can permanently reduce their clarity and lifespan. When the goggles are not in use, store them in a padded, dark case to prevent accidental exposure to light, and remove the batteries if the device will remain unused for an extended period.
Combat Medic Training

Combat Medic Training builds the ability to act immediately and correctly during a trauma emergency. It is about gaining the knowledge and repetition required to perform under stress when every second matters. The goal is to stop major bleeding with a properly applied tourniquet, secure the airway to maintain breathing, and seal chest wounds to prevent collapse. These are not advanced medical techniques but essential measures to keep someone alive during the most critical minutes after an injury.
Core Lifesaving Skills Priority
- Bleeding Control: Learn how to identify major bleeding and apply a tourniquet above the wound to stop blood loss.
- Airway Management: Practice positioning a casualty to maintain an open airway and use basic tools such as a nasopharyngeal airway when trained.
- Chest Injury Response: Understand how to seal a penetrating chest wound using a vented or improvised chest seal to prevent lung collapse.
- Shock Prevention: Keep the patient warm and elevate the legs slightly to improve circulation while awaiting evacuation.
- Evacuation Technique: Use drag handles or improvised stretchers to move a casualty safely without causing further harm.
Beginner Individual First Aid Kit (IFAK) Essentials
- Tourniquet: A medical device that stops severe limb bleeding when applied correctly and secured in place.
- Pressure Bandage: Designed to maintain constant pressure on a wound and reduce blood loss during transport.
- Chest Seal: Used to close chest wounds and prevent air from entering the pleural space.
- Compressed Gauze: Supports wound packing and adds pressure to deep lacerations or junctional wounds.
- Gloves: Protect both the responder and the casualty from infection during treatment.
- Trauma Shears: Allow quick removal of clothing without disturbing the injury site.
- Marker and Note Card: Records the time of tourniquet placement and key details for handoff to medical personnel.
Combat Survival: Defense Against Threats
Combat survival focuses on managing direct threats and medical emergencies when professional help is delayed or unavailable. It requires proficiency in close quarters combat to control distance and movement in confined spaces, tactical shooting to apply accurate and disciplined fire under stress, and battlefield medicine to stabilize injuries. These three skills form a single system of defense, control, and treatment that allows you to act decisively instead of reactively.
Close Quarters Combat

Close Quarters Combat, or CQC, is a discipline that teaches how to move and defend in tight environments where space and time are limited. It originally developed from military and law enforcement tactics used in building entries and hostage rescues. Over time, training methods were adapted for civilians to focus on home defense, personal safety, and de-escalation rather than offensive missions. Civilian CQC emphasizes controlled movement, situational awareness, and firearm safety within confined areas such as hallways or rooms. Military CQC remains focused on team coordination and target engagement during operations. Anyone new to this field should begin with civilian-level instruction from qualified trainers who stress safety and judgment before live-action drills.
Solo vs. Team Entry Basics
CQC movement changes depending on whether a person is acting alone or with a group. Solo entry requires careful angle control and steady movement because there is no one to cover blind zones. Team entry relies on communication and spacing to avoid crossfire or obstruction. The table below explains the main considerations for each approach:
| Feature | Solo Entry | Team Entry |
| Speed | Movement is slower to reduce exposure and maintain awareness. | Movement is faster because multiple members can secure angles simultaneously. |
| Coverage | One person manages all angles and must clear corners sequentially. | Each member covers a specific sector to minimize gaps in visibility. |
| Risk | Higher risk due to limited view and no partner support. | Lower risk if communication is clear and spacing is maintained. |
| Focus | Prioritizes self-preservation and retreat paths. | Prioritizes coordinated entry and mutual protection. |
Common Beginner CQC Pitfalls
CQC mistakes become dangerous quickly because confined spaces magnify small errors.
- Overconfidence: Rushing entry without adapting to the environment increases the chance of surprise contact.
- Poor Muzzle Discipline: Allowing the muzzle to sweep uncontrolled areas endangers bystanders and teammates.
- Miscommunication: Failing to use a single, agreed signal creates confusion during movement.
- Improper Spacing: Closing distance to walls or partners limits your ability to react and turn.
- Neglecting Practice: Skipping regular, supervised drills prevents skills from being reliable under stress.
Battlefield Medicine

Battlefield medicine focuses on providing emergency medical care when professional help is delayed or unavailable. The goal is to keep a casualty alive through the most critical minutes after injury. It builds on the same principles used by combat medics but adapts them for civilian responders and austere environments. Beginners should learn to identify life-threatening conditions and act with speed and control rather than attempting complex medical procedures. Every action centers on stopping bleeding, maintaining breathing, and preventing shock until evacuation or higher care is possible.
Basic First Aid & Trauma Kit Essentials
- Tourniquet: A strap and windlass device that stops heavy bleeding when secured above a wound.
- Pressure Bandage: A self-contained bandage that maintains firm pressure to control external bleeding.
- Chest Seal: A single-use adhesive barrier that prevents air from entering an open chest wound.
- Gauze and Hemostatic Agent: Standard and clot-promoting materials for packing deep injuries.
- Gloves: Disposable hand coverings that limit contamination during casualty care.
- Trauma Shears: Heavy-duty scissors designed to remove clothing and expose injuries safely.
- Thermal Blanket: A lightweight reflective sheet that retains body heat and reduces the effects of shock.
Initial Care: Bleeding & Chest Injuries
- Massive Bleeding: Identify the wound source quickly and apply direct pressure with gauze or a clean cloth to slow blood loss before using a tourniquet.
- Tourniquet Application: Place the tourniquet two to three inches above the wound, tighten until bleeding stops, and mark the application time for medical personnel.
- Wound Packing: Insert gauze tightly into deep or junctional wounds where a tourniquet cannot be used, then secure with a pressure bandage.
- Chest Wounds: Apply a vented chest seal to open injuries on the torso to prevent trapped air from collapsing a lung; monitor for changes in breathing.
- Breathing Observation: Listen for labored breathing or bubbling at the wound site, which may indicate air accumulation requiring medical decompression.
- Casualty Positioning: Keep the casualty upright if breathing is difficult or flat with elevated legs if symptoms of shock begin to appear.
Tactical Shooting

Tactical shooting teaches a shooter to control a firearm while moving through an environment and scanning for threats. It originated in military and law-enforcement drills for close-in engagements and building entries. Civilian courses focus on safe firearm handling under pressure and teach legal considerations for the use of force. Moreover, tactical shooting training uses step-by-step drills with instructor feedback to build habits that remain reliable when adrenaline rises.
Safe Handling & Range Basics
- Muzzle Awareness: Always point the muzzle in a safe direction to prevent accidental injury during movement and reloads.
- Trigger Discipline: Keep your finger off the trigger until you intend to fire to prevent unintentional discharges.
- Action on Unsafe Condition: If a firearm malfunctions, clear it using a practiced sequence to reduce risk.
- Range Commands: Follow the range officer’s commands immediately to maintain coordinated and safe activity.
Building Accuracy & Confidence
- Stance and Grip: Adopt a stable stance and a repeatable grip to make follow-up shots predictable.
- Sight Focus: Align the sights on the target and control your breathing so each shot leaves the barrel with intent.
- Dry Practice: Perform unloaded drills at home to build smooth manipulation and reduce anxiety before live fire.
- Progressive Loading: Increase training difficulty in small steps so competence improves without being overwhelming.
Reconnaissance: Gathering Information Before You Act
Reconnaissance is the disciplined practice of maintaining situational awareness by collecting information and controlling what information others can collect about you. Effective reconnaissance also includes intelligence gathering, identifying reliable data sources, and operational security (OPSEC), which protects details about your routines and resources from exploitation. The objective is not constant vigilance but structured awareness: knowing what is happening around you soon enough to make wise decisions.
Surveillance Equipment

Surveillance equipment helps detect, record, and deter suspicious activity in and around a property. It creates an early warning system that improves awareness and response time during emergencies or daily security checks. Modern systems are accessible to homeowners and renters because they no longer require complex wiring or large budgets. Security cameras, motion sensors, and alarms now operate through wireless networks that can be monitored from a phone or computer. Overall, the goal is to create visibility, not to invade privacy or record without consent.
Home Camera and Sensor Basics
- Entry Cameras: Position cameras at doors and gates to record anyone entering or leaving. Keep them at eye level for clear identification rather than high angles that lose facial detail.
- Driveway Cameras: Place cameras facing outward from the home to capture approaching vehicles. Make sure the lens avoids glare from headlights or reflective surfaces.
- Interior Monitors: Use a small indoor camera to watch hallways or entry transitions. Install it near power outlets and Wi-Fi coverage to prevent signal drops.
- Motion Sensors: Place sensors at hallway corners or near ground-level windows to trigger alerts when movement occurs. Adjust sensitivity to avoid false alarms from pets or wind.
- Lighting Integration: Pair motion lights with cameras so illumination improves image clarity at night without draining power continuously.
- Power Source Planning: Choose plug-in or solar power depending on location, and ensure every device has a battery backup in case of outage.
Simple Setup and Privacy Tips
- Map the Coverage Area: Sketch or mark where each camera and sensor should point. Avoid overlapping zones that create redundant footage.
- Check Signal Strength: Test Wi-Fi or cable connection at each installation point to prevent delayed recording or missed alerts.
- Secure Data Storage: Use encrypted cloud storage or a password-protected local drive to keep recordings safe from tampering.
- Update Firmware Regularly: Apply software updates to close security gaps that hackers may exploit.
- Respect Privacy Zones: Angle cameras away from neighboring properties and shared walkways to comply with local privacy laws.
- Label Access Accounts: Assign unique logins to each household member so activity and device changes are traceable.
- Run Monthly Checks: Review camera angles, sensor batteries, and alert functions at least once per month to keep the system reliable.
Radio Communication

Radio communication allows people to stay connected when phones or internet networks fail. It works through direct signal transmission between radios without relying on cell towers. This makes it valuable during storms, blackouts, or remote travel. Many households now include small radios in their emergency kits to coordinate movement and share updates when normal communication breaks down. Understanding range limits and battery care helps prevent failure when it matters most.
Family Radio Options (FRS/GMRS)
FRS (Family Radio Service) and GMRS (General Mobile Radio Service) are personal, two-way radio systems designed for short-range communication. FRS is license-free and suited for local use, while GMRS requires a license but provides higher power, longer range, and access to repeater stations for extended coverage. The table below outlines how they differ:
| Feature | FRS Radios | GMRS Radios |
| License Requirement | No license needed for operation. | FCC license required for legal use in the U.S. |
| Typical Range | Works best within one to two miles in open terrain. | Can reach five to ten miles depending on terrain and antenna quality. |
| Power Output | Limited to two watts or less for safety and battery efficiency. | Allows higher power output up to fifty watts for extended range. |
| Channel Sharing | Shares channels with GMRS but operates at lower power. | Shares channels with FRS but can use repeaters for added coverage. |
| Cost and Simplicity | Affordable and easy to use with no setup required. | Slightly higher cost due to added range and licensing needs. |
Battery Life and Charging Tips
- Use Rechargeable Packs: Select radios that support rechargeable lithium-ion or NiMH packs to reduce long-term cost.
- Carry Spare Power: Keep extra batteries in a waterproof pouch so the radio remains functional during extended outages.
- Avoid Full Drain: Recharge before the battery reaches complete depletion to extend overall lifespan.
- Label Chargers: Mark each charger by radio type to prevent damage from mismatched voltage or connectors.
- Cycle Batteries Monthly: Discharge and recharge stored batteries monthly to keep the radio working.
Intelligence Gathering

Intelligence gathering is the process of collecting and verifying information to make better decisions during emergencies or periods of uncertainty. In a survival or preparedness setting, it focuses on awareness rather than espionage. The goal is to understand what is happening in your local area so you can decide when to stay, when to move, and how to prepare for incoming disasters.
Staying Informed Locally
- Local Radio and Scanner Apps: Listen to public safety channels and community broadcasts to track weather alerts, road closures, and emergency dispatches.
- Community Watch Groups: Join neighborhood or online community networks where residents share verified local updates about safety or utility issues.
- Official Emergency Alerts: Register for local government text alerts or emails that deliver verified warnings directly to your phone.
Verifying News & Sources
- National Weather Service (NWS): Provides accurate, real-time weather updates that can be cross-checked against local radio or television reports.
- Federal Emergency Management Agency (FEMA): Posts verified alerts, evacuation guidance, and recovery resources through official websites and apps.
- Local Law Enforcement or Public Information Office: Shares situation reports, curfews, and verified public notices during crises, ensuring that updates come from authorized personnel.
Operational Security

Operational security, often shortened to OPSEC, is the process of identifying and controlling information that could be used against you. It teaches how to think before sharing, posting, or transmitting details that reveal patterns about your life. In 2025, operational security requires awareness of how technology records and transmits personal data. Each connected device, from a thermostat to a vehicle, collects information that can reveal patterns about your life. The goal is to stay informed and selective about information flow rather than withdraw completely from digital tools.
Everyday Privacy Habits
- Manage Smart Devices: Disable unnecessary voice assistants or sensors on home systems that record activity data, especially in sleeping or storage areas.
- Review App Permissions: Check every app on your phone and remove access to contacts, microphone, or location data unless absolutely needed.
- Limit Digital Identity Links: Use separate email addresses for shopping, banking, and social accounts to prevent cross-tracking.
- Secure Home Networks: Rename Wi-Fi networks to remove personal identifiers and use strong encryption to block unauthorized connections.
Protecting Digital Devices
- Two-Factor Authentication: Activate two-step verification on all major accounts so that stolen passwords cannot grant access.
- Automatic Security Updates: Turn on auto-updates for phones, routers, and smart home hubs to close vulnerabilities before they are exploited.
- Encrypted Backups: Store essential files on encrypted drives or secure cloud services so that lost or stolen devices do not expose private data.
Tactical Survival Training: Competence is the Best Defense
When essential systems fail, the response is no longer found in panic buying or wishful thinking, but in a disciplined shift toward tactical readiness. Your ability to survive and protect your family is wholly dependent on mastering three essential pillars: Tactical Gear (your reliable, organized tools), Reconnaissance/OPSEC (your verified knowledge and secured information), and Combat Survival (your critical life-saving skillset). Building competence across these disciplines will help you become the immediate responder for yourself and your family.
FAQs
Q: What is the minimum starter setup for tactical survival?
A: Use a 25–35L pack with water carry and filter, headlamp or flashlight, knife or multi-tool, basic food, an IFAK, and a simple FRS/GMRS radio.
Q: Where should a beginner focus training time first?
A: Learn bleeding control and airway basics, set up a radio check-in plan, and practice low-light movement at home before adding CQC or range work.
Q: Do I need night vision or advanced tactical gear to be effective?
A: No. Prioritize dependable light, medical, and communication; add specialty tools only after you can run the basics under stress.