How To Winterize Your Car: A Quick Summary
- Time & cost: Plan ~90 minutes and $60–$180 in consumables (tires extra).
- Tire decision: Switch to winter tires when highs stay ≤45°F (7°C); replace snow tires at ≤4/32 in tread.
- Battery go/no‑go: After the car sits 4+ hours, a healthy battery shows 12.6–12.8 volts. During a 10‑second crank at 70°F (21°C), voltage should stay at or above 9.6 volts. In colder weather, lower the target by about 0.1 volt for every 10°F drop (example: at 30°F, pass ≥9.2 volts). If the battery is 4–5 years old or fails these checks, replace it.
- Coolant/fluids: 50/50 mix protects to –34°F (–37°C); use winter‑rated washer fluid (≤–20°F / –29°C).
- Cadence: Recheck tire pressure & washer fluid monthly through March; run the Ten‑Minute Family Drill before the first storm.
Cold weather can punish the car systems that your family relies on most. Oil thickens and batteries lose cranking power even as tires harden and braking distances stretch. Also, windows fog and freeze just when you need to see clearly. The point of winterizing is not to bolt random accessories onto your car; it is to remove weak links methodically so the car behaves predictably when temperatures drop. We will move front‑to‑back and system‑by‑system, pairing each task with a simple acceptance test so you know when you are done.
The smart approach to winterizing your car work in the following order:
- Fluids → Battery and Starting → Tires and Brakes → Visibility → Heat and HVAC → Roadside Readiness.
- Plan for about 90 minutes and $60–$180 in consumables (winter tires not included).
- Work on a level surface with the parking brake set, and keep children clear of the vehicle while it is running.
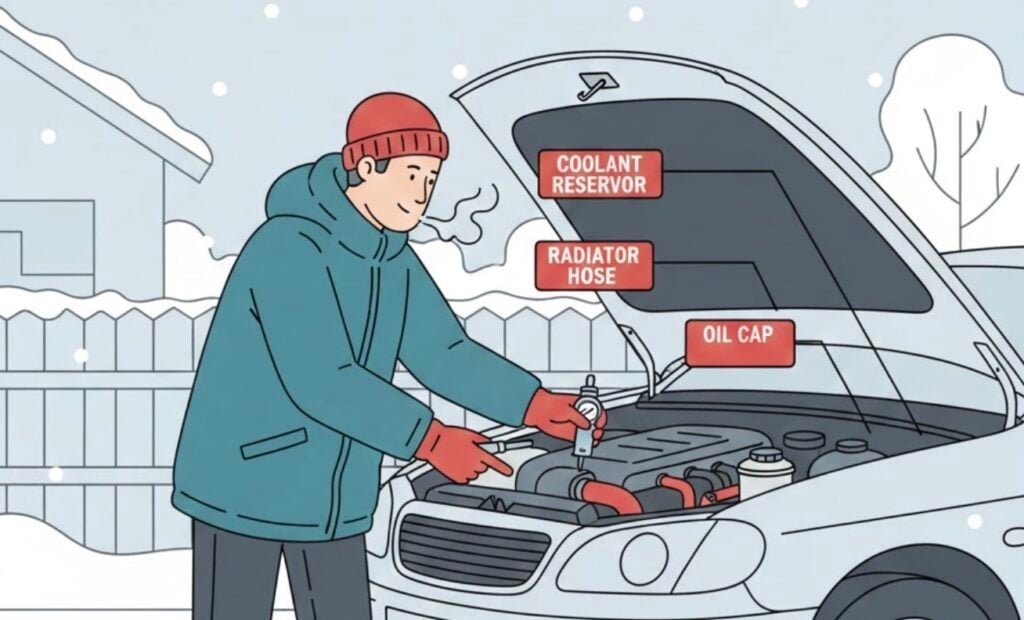
Step 1: Fluids & Cooling System

When winterizing your car, always remember that a modern engine depends on the correct coolant mixture to prevent freezing. A season‑appropriate oil and washer fluid are also better equipped to handle short trips and spray.
What to do:
- With the engine cold, confirm that the coolant reservoir is at the “Full” mark and that the mixture protects to at least –34°F (–37°C). Use a simple coolant tester or check the label on a fresh 50/50 premix. Top up with the same chemistry already in the system.
- Inspect the upper and lower radiator hoses and small heater hoses. You are looking for swelling, soft spots, or crusted leaks at clamps. Replace anything suspicious now rather than in January.
- Change the oil if your service is due within the next 1,000 miles. Choose the winter grade listed in your owner’s manual (for many vehicles that is 0W‑20 or 5W‑30). Thinner winter‑rated oil reduces strain on the starter and battery.
- Drain the summer windshield fluid from the reservoir and refill with a winter‑rated formula (look for –20°F / –29°C or lower on the label). This prevents refreeze on the glass
Fluids Acceptance Test: Your car’s engine should have no visible leaks, the coolant level is steady at the mark, and the washer sprays cleanly without streaking or freezing on a short test drive.
Step 2: Battery, Cables & Cold Starts
Cold is the enemy of batteries. A borderline unit that seems fine in October will leave you stranded at dawn in December.
How to Winterize Your Car Battery and Cables:
- Let the car sit for at least four hours, then read the battery with a multimeter. A healthy 12‑volt battery shows 12.6–12.8 volts at rest. If you see 12.2 volts or less, charge the battery fully before you judge its condition.
- Perform a load test. Crank the engine while watching voltage or ask a parts store to test for you. Under load at 70°F (21°C), voltage should not fall below 9.6 volts. Expect slightly lower numbers in colder weather; the idea is to avoid a deep sag.
- Clean the terminals with a brush, tighten the clamps, and apply a thin film of dielectric grease to deter corrosion. Check the main grounds while you are there.
- Decide proactively. If your battery is four to five years old or fails the load test, replace it before the first deep freeze. Choose a unit with the correct group size and a respectable cold‑cranking‑amps rating for your vehicle.
Car Battery Acceptance Test: The engine starts on the first try without the lights dimming dramatically, even after sitting overnight in cold weather.
Step 3: Tires & Brakes

Braking distance and steering control come down to three things in winter: tread depth, compound, and pressure. Brakes must also be predictable when ABS engages on slick surfaces.
How to Check Your Tires and Brakes:
- Measure tread depth across each tire. Winter traction falls off quickly below 4/32 in (3.2 mm). If you live with regular snow or ice, replace tires that measure at or below this mark.
- Decide whether to switch to dedicated winter tires. If your local temperatures sit at or below 45°F (7°C) most days, winter tires with the Three‑Peak Mountain Snowflake symbol provide a dramatic safety margin. Mount them on a spare set of wheels for quick swaps.
- Set pressures cold to the numbers on the driver‑door placard. Expect pressure to drop about 1 psi for every 10°F decline in temperature. Recheck monthly through winter.
- Inspect the brakes. Confirm pad thickness of at least 3–4 mm, look for uneven rotor wear, and test the brake fluid for moisture if you have a strip. Top up only after you rule out leaks.
Wheels Acceptance Test: The TPMS light stays off, the car tracks straight under moderate braking, and ABS activation is smooth in an empty‑lot test at low speed.
Step 4: Visibility (Glass, Wipers & Lights)
Visibility is your most valuable winter feature. A clear windshield and bright, correctly aimed headlights prevent small problems from becoming accidents.
How to Ensure Visibility During Winter
- Install winter‑type wiper blades (beam‑style with an ice‑shedding boot). Clean the windshield thoroughly with glass cleaner and a final alcohol wipe to strip film.
- Test the front and rear defrosters. If the rear grid has broken lines, repair them with a simple conductive‑paint kit. Replace any blown fuses.
- Do a dusk walk‑around. Check low beams, high beams, turn signals, brake lights, and reverse lights. Clean cloudy lenses or schedule a restoration. Aim headlights if they appear too high or too low.
- Stage your de‑icing tools where you can reach them from the driver’s seat: a scraper, a small bottle of spray de‑icer, and a microfiber towel. Treat door seals with silicone and lubricate locks with graphite so they do not freeze shut.
Visibility Acceptance test: With the engine idling, the windshield clears in three minutes or less using the defrost setting, and every exterior light is bright and working.
Step 5: Heat & HVAC
A car that heats slowly invites fogged glass and unhappy riders. A few quick checks keep the cabin comfortable and the glass clear.
Try This Basic Heat Check:
- Replace the cabin air filter if it looks dirty. Restricted airflow slows defogging.
- Bring the engine to operating temperature and test the heater on all vents. If the air is only lukewarm, verify coolant level and have the system bled; a partially clogged heater core may need a flush.
- Fit rubber floor mats for winter. They trap snowmelt, prevent slippery pedal surfaces, and make cleanup simple.
Heating Acceptance Test: The cabin feels warm within ten minutes at idle and the glass clears promptly with the A/C‑assisted defog setting.
Step 6: Emergency Roadside Plan

Even with a well‑prepared car, storms can close roads and strand drivers almost immediately. Your goal is to stay warm, visible, and reachable until help arrives.
Pack the following and leave it in the vehicle all winter:
- A compact shovel and a small traction aid (traction boards or a bag of non‑clumping kitty litter).
- Jumper cables or a charged lithium jump pack.
- Blankets, hats, gloves, and a few chemical hand warmers.
- An LED headlamp with spare batteries.
- A basic first‑aid kit and any prescription medication your family cannot miss for 72 hours.
- Shelf‑stable snacks and water. Leave headspace in bottles so they can freeze without bursting.
- A 12‑volt phone charger and a charged power bank.
- Reflective triangles or LED beacons.
- An ice scraper, snow brush, and a microfiber towel.
- A paper map of your local area in case phones die or coverage disappears.
Roadside Emergency Acceptance Test: If the car will not move, you can keep the family warm, visible, and in contact for at least three hours without outside help.
Practice Winterizing Your Car Via a Ten‑Minute Family Drill
Strong plans survive due to constant practice. Before the first storm hits, try to run this quick car winterization drill.
- Assign roles: one person starts the car and sets defrost; another verifies lights; a third checks the roadside kit. Set a timer for ten minutes.
- Confirm that the windshield clears, all exterior lights work, the phone charges from the car, and everyone knows where the blanket and scraper live.
- Decide where the car will park on the coldest night (prefer a garage or a spot out of the prevailing wind). Note the decision on a sticky note inside the garage door.
If any step fails, fix it now. Once the family can complete the drill smoothly, you are winter‑ready.
Take Note: Regional & Legal Notices You Should Know
Rules differ across states and provinces, especially for traction devices and chemicals in washer fluid. If you travel mountain passes, check whether chains are required during posted conditions and buy a set that fits your tire size. If your winters regularly dive below zero, use a block heater on a GFCI‑protected outlet and set a timer to pre‑warm the engine two to four hours before departure. Route any cords you use so they won’t trip anyone.
Quick Winterization Troubleshooting Guide:
- Slow cranking on cold mornings: Charge the battery fully and retest. If cranking voltage sags badly, the battery is at end of life.
- Smearing wipers or refreezing spray: Degrease the glass with alcohol, fit winter blades, and confirm that the washer fluid is truly winter‑rated.
- Persistent TPMS light: Set pressures with the tires cold, then drive 15 minutes. If the light remains on, check the spare (some cars monitor it) or have sensor batteries evaluated.
- Lukewarm cabin heat: Verify coolant level and bleed air from the system. If temperature still lags, a heater‑core flush may be in order.
- Frozen doors or locks: Warm the key in your gloved hand, use de‑icer sparingly, and treat seals with silicone after thawing to prevent a repeat.
Final Pass/Fail Checklist
How do you know if you mastered how to winterize your car? Here’s a handy checklist to see how far you’ve gone:
- The car starts on the first attempt after sitting overnight in the cold.
- Braking is straight and predictable; the ABS test in an empty lot is uneventful.
- Headlights are bright and properly aimed; the windshield clears within three minutes at idle.
- The cabin warms within ten minutes and stays clear of fog.
- The roadside kit is stocked and reachable without digging through the trunk.
Deep Dives: A 2‑Minute Cheat Code on How to Winterize Your Car

Cold‑Weather Battery (CCA, sizing, and replacement rule)
- Find the factory CCA on your battery label or owner’s manual.
- Sizing rule: Choose replacement ≥ OEM CCA; in sub‑zero climates, aim for +15–25% CCA if it fits your tray.
- Health check: Resting voltage after 4+ hrs 12.6–12.8V; during a 10‑sec crank ≥9.6V @ 70°F (subtract ~0.1V per 10°F colder). Fails → replace.
- Terminals: Clean/tighten; add a thin film of dielectric grease.
Winter Tires vs. All‑Season (decision in 30 seconds)
- If daily highs are ≤45°F (7°C) for weeks, pick 3PMSF winter tires. You’ll stop shorter and steer better even on dry, cold pavement.
- If you only see a couple of light snows and roads are plowed fast, high‑quality all‑weather (not plain all‑season) is a compromise.
- Tread rule: For snow/ice, replace at ≤4/32 in. AWD helps you go; winter tires help you stop.
Chains Without Damage (quick setup)
- Sizing: Match the code on your sidewall (e.g., 225/60R17) to the chain chart—near‑fits chew fenders.
- Dry run: Practice once on dry pavement.
- Install sequence: Lay flat → drape over tire → connect inner fastener → connect outer → tighten with tensioner.
- Speed: Max 30 mph (check your kit). Re‑tension after 100–200 yards.
72‑Hour Car Kit (family‑safe quantities)
- Warmth: 1 blanket/person + 2 chemical hand warmers/person/day.
- Light/comm: 1 LED headlamp + spare batteries; 1 car charger + 10,000 mAh power bank.
- Food/water: 2,000 kcal/person/day (bars, nuts); 1–2 L/person/day. Leave headspace so bottles can freeze without bursting.
- Extras with kids/pets: diapers/wipes; formula & measured water; leash, collapsible bowl, 72‑hr food zip‑bag.
- Stow point: top layer of trunk or behind a hatch net—no digging required.
Acceptance checks for the cheats above
- Battery passes voltage tests and cold‑start on first try.
- Tires measure >4/32 in and are appropriate for your climate; TPMS off.
- You can install both front chains in ≤5 minutes each on a dry run.
- The trunk kit sustains everyone for 3 hours stranded and covers 3 winter days of short drives.
How to Winterize Your Car: Bring It Home
Winter driving rewards preparation, not luck. You have just removed the weak links that strand most drivers in the first cold snap. Now convert that work into a habit and a safety margin you can count on. Before the weekend ends, complete these three actions to lock in your winter readiness:
- Print this page (File → Print → Save as PDF) and tape the checklist near the garage door.
- Stock the trunk kit using the quantities in 72‑Hour Car Kit under Deep Dives — 2‑Minute Cheats above.
- Set a calendar reminder to recheck tire pressures and washer fluid on the 1st of each month through March.
Your move: take ten minutes tonight to run the family drill and stage the scraper, blanket, and jump pack where everyone can reach them. Soon, the next icy morning won’t be a gamble but a systems check that you’ve already passed.